
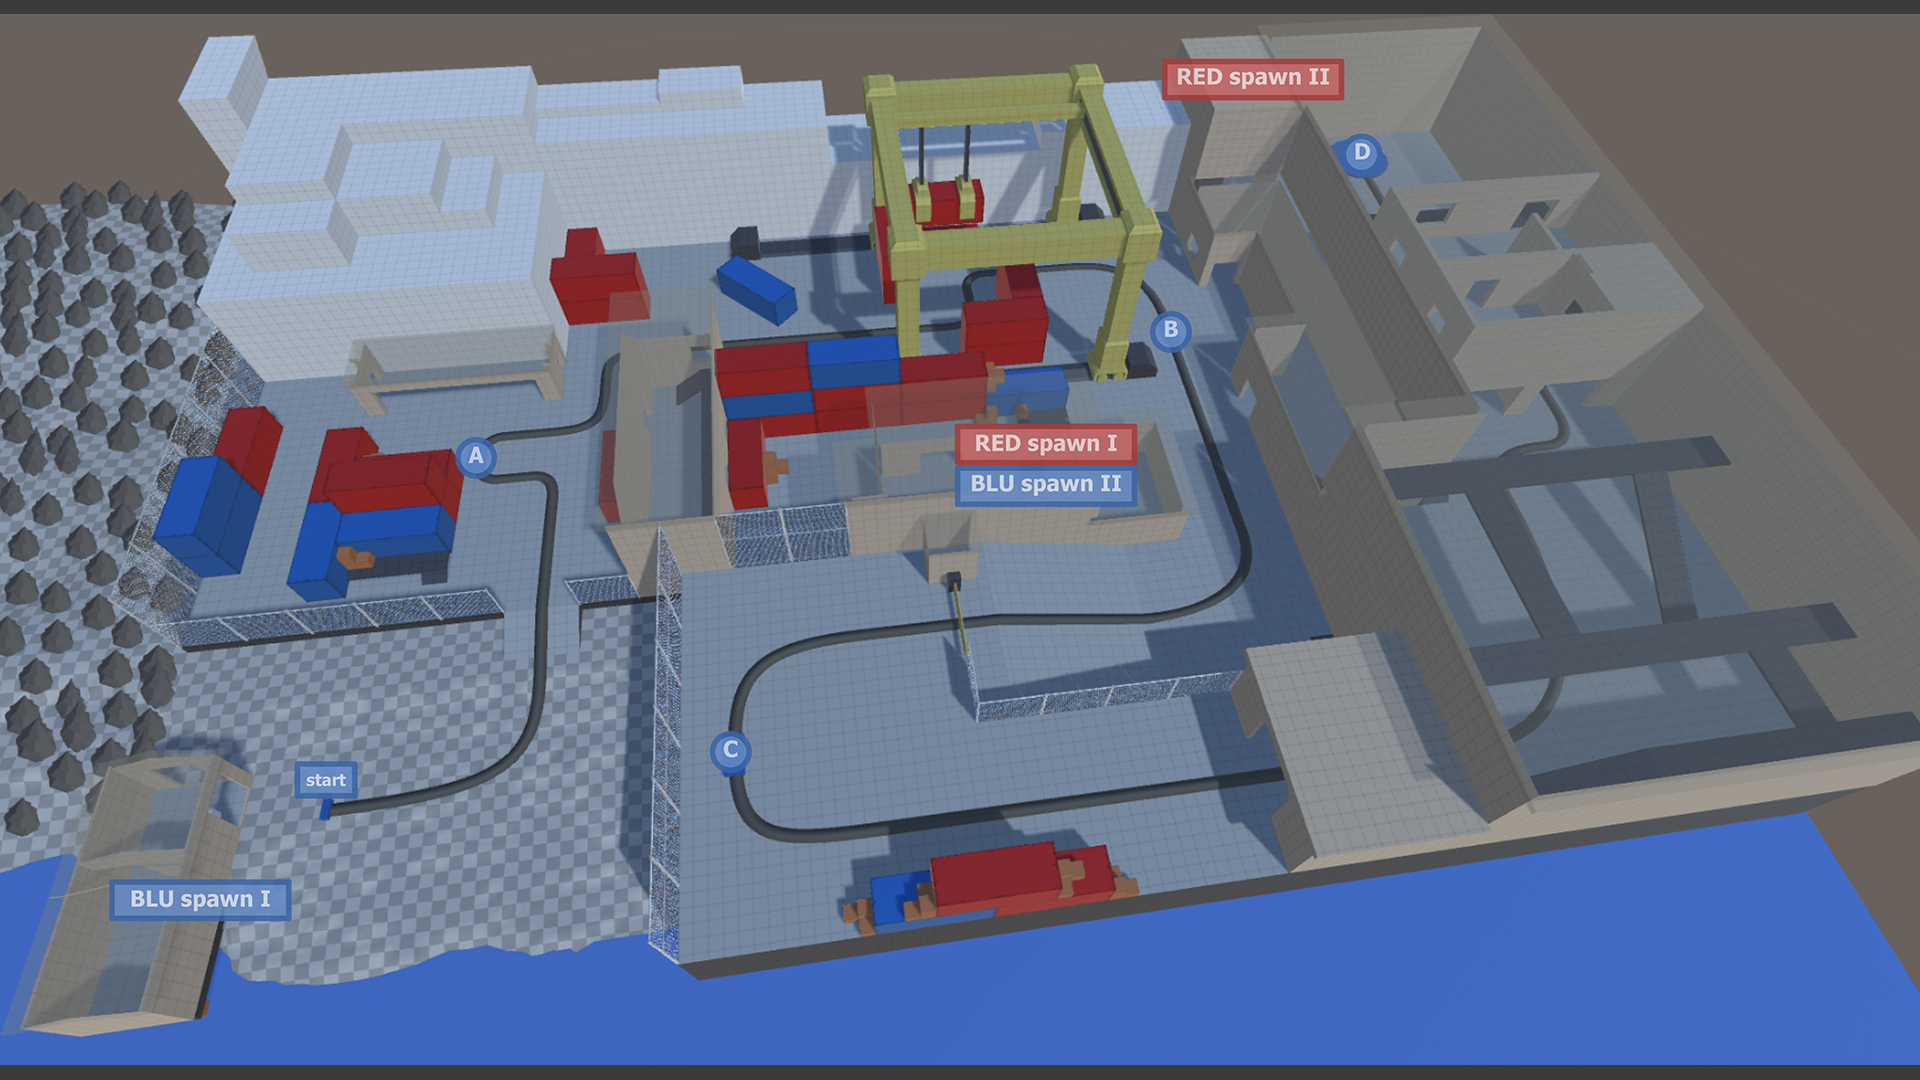
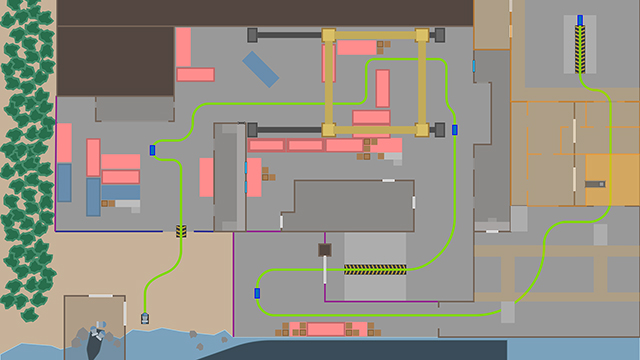
This level design practice is a layout and blockout for a TeamFortress 2 payload map.
The BLU team has hijacked one of RED’s rails to deliver a bomb straight through the enemy’s container yard and into their base.
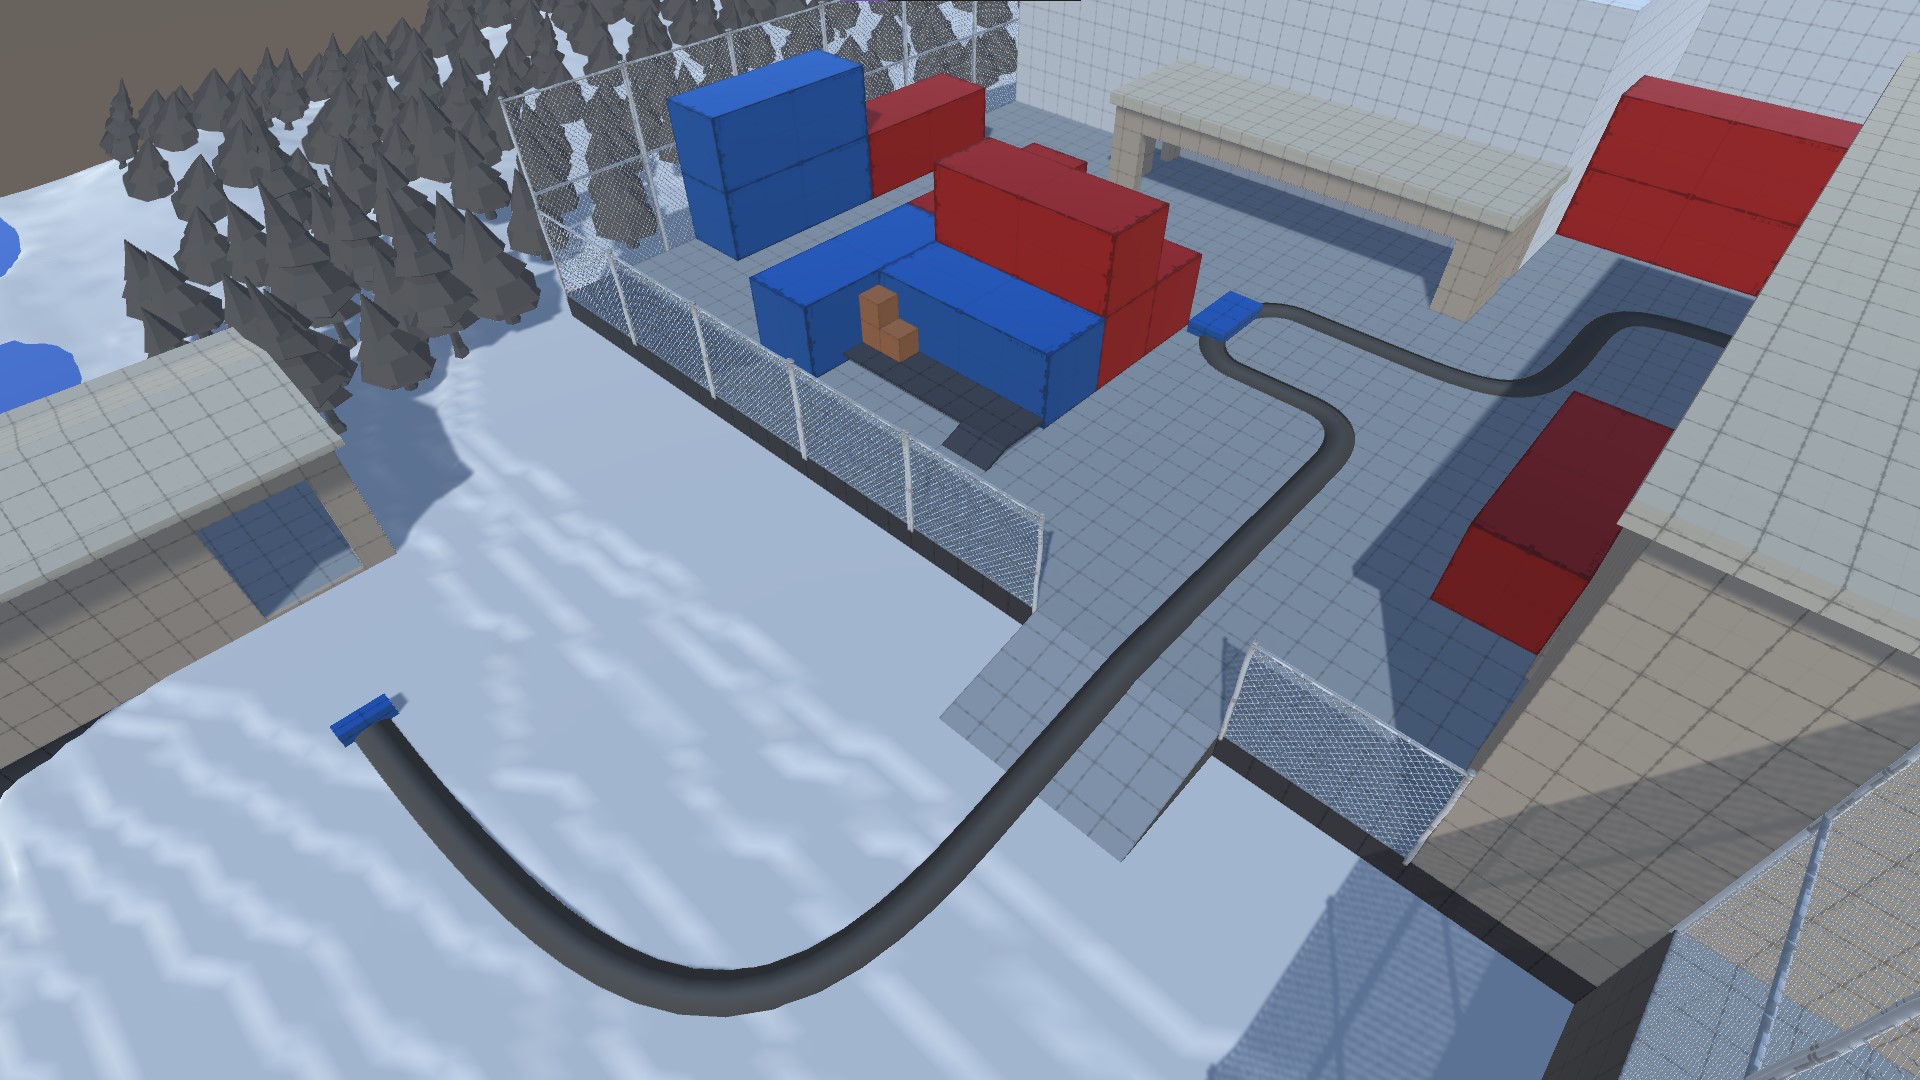
BLU team needs to push the cart up the beach, which could make it easy for RED to spam them down from the high ground. To prevent this, the terrain rises very gradually, and fences are put in place to separate it from the actual point. This does not completely shut down the RED team because Demos can still lob pipes, and Soldiers can rocket jump.
The actual area for point A has 2 symmetrical flank routes and a room with a wide opening where Snipers and Sentries can be set up. However this room can be accessed from many sides, so it is not a very strong outpost. This area is intended to give BLU a small advantage, because it is not very fun when RED wins on the first point, since that means the game has been stuck on the same area for its entire duration.
The RED team spawns in the big building map-center until B is capped, when their spawn is sent all the way back to their base and BLU spawns here instead. This location is meant to provide quick access to all the areas outside RED’s base.
It connects to point A, through the windows of its left flank building, and to the straight pass that follows said point. High mobility classes can directly get to it, while the rest need to go around the large containers. That pass is made to provide opportunities for multiple skirmishes, given its many access points, limited cover, and wide nature.
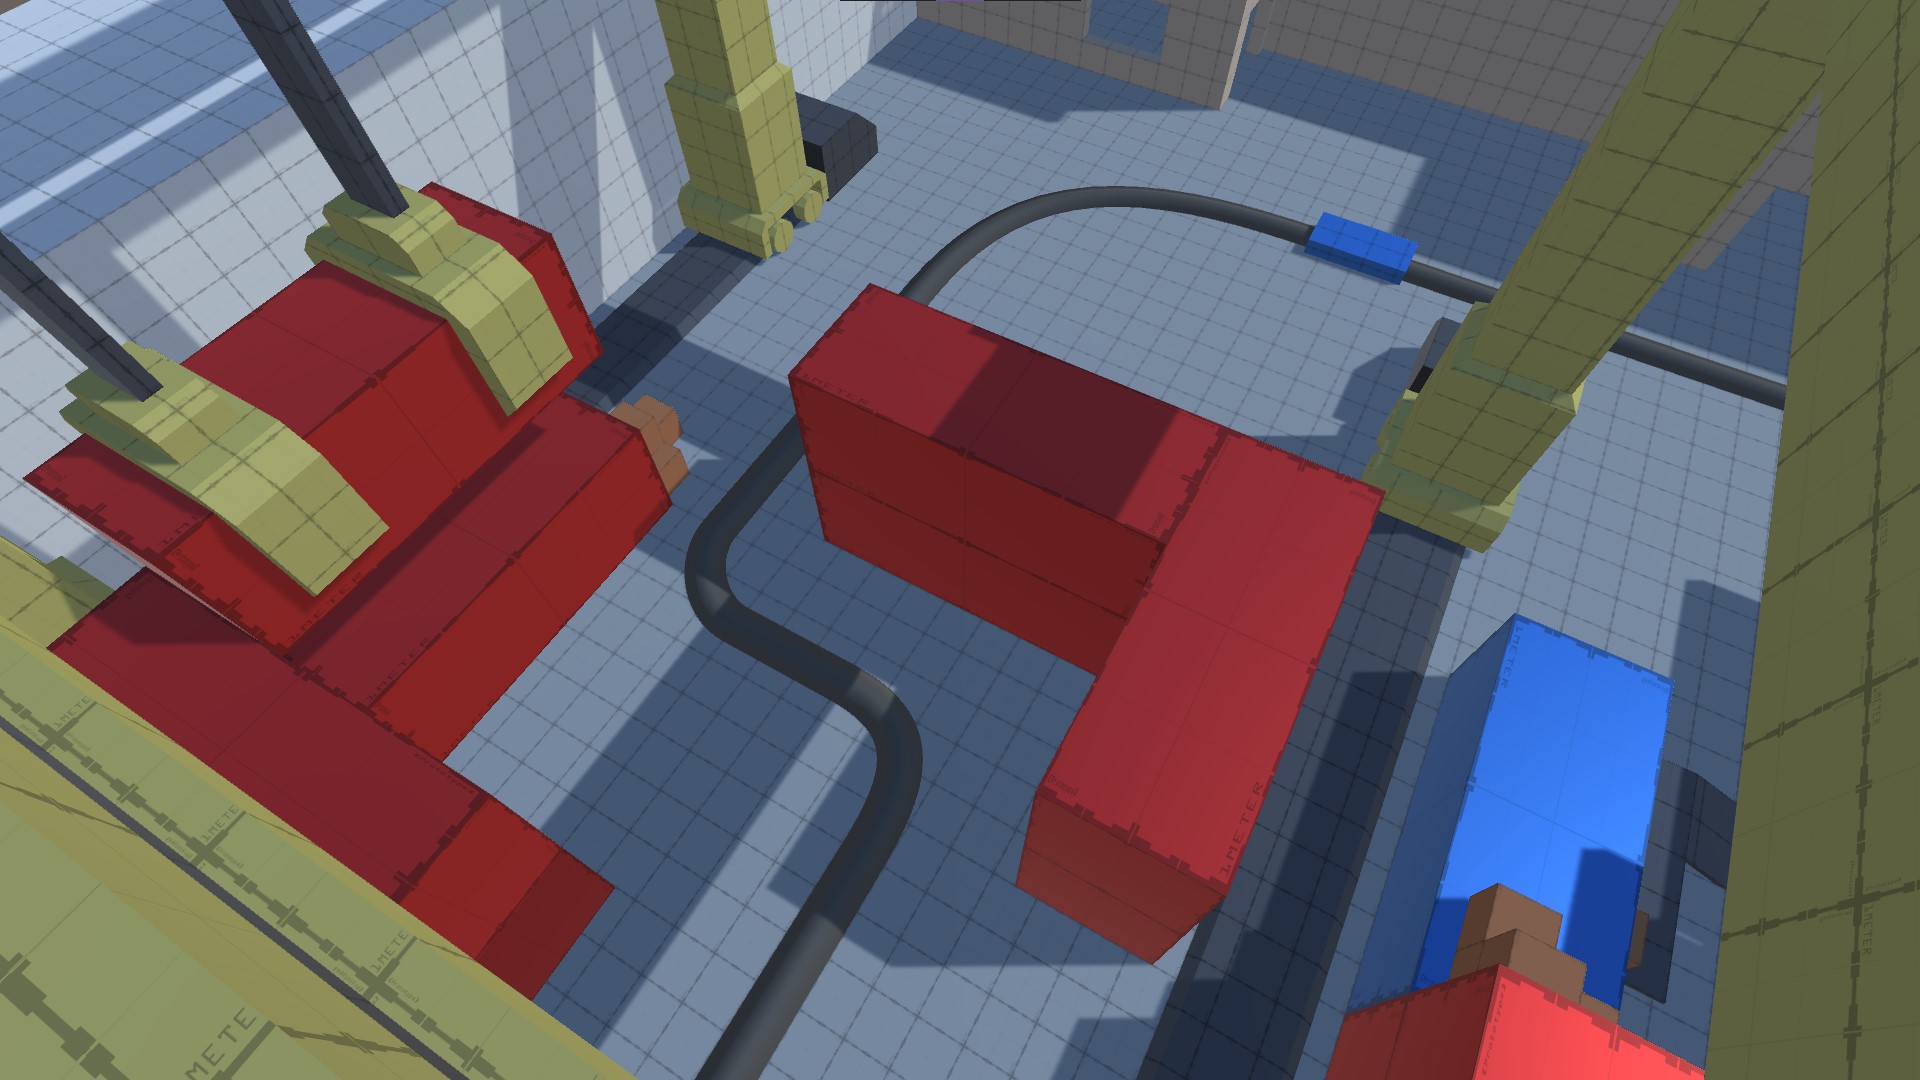
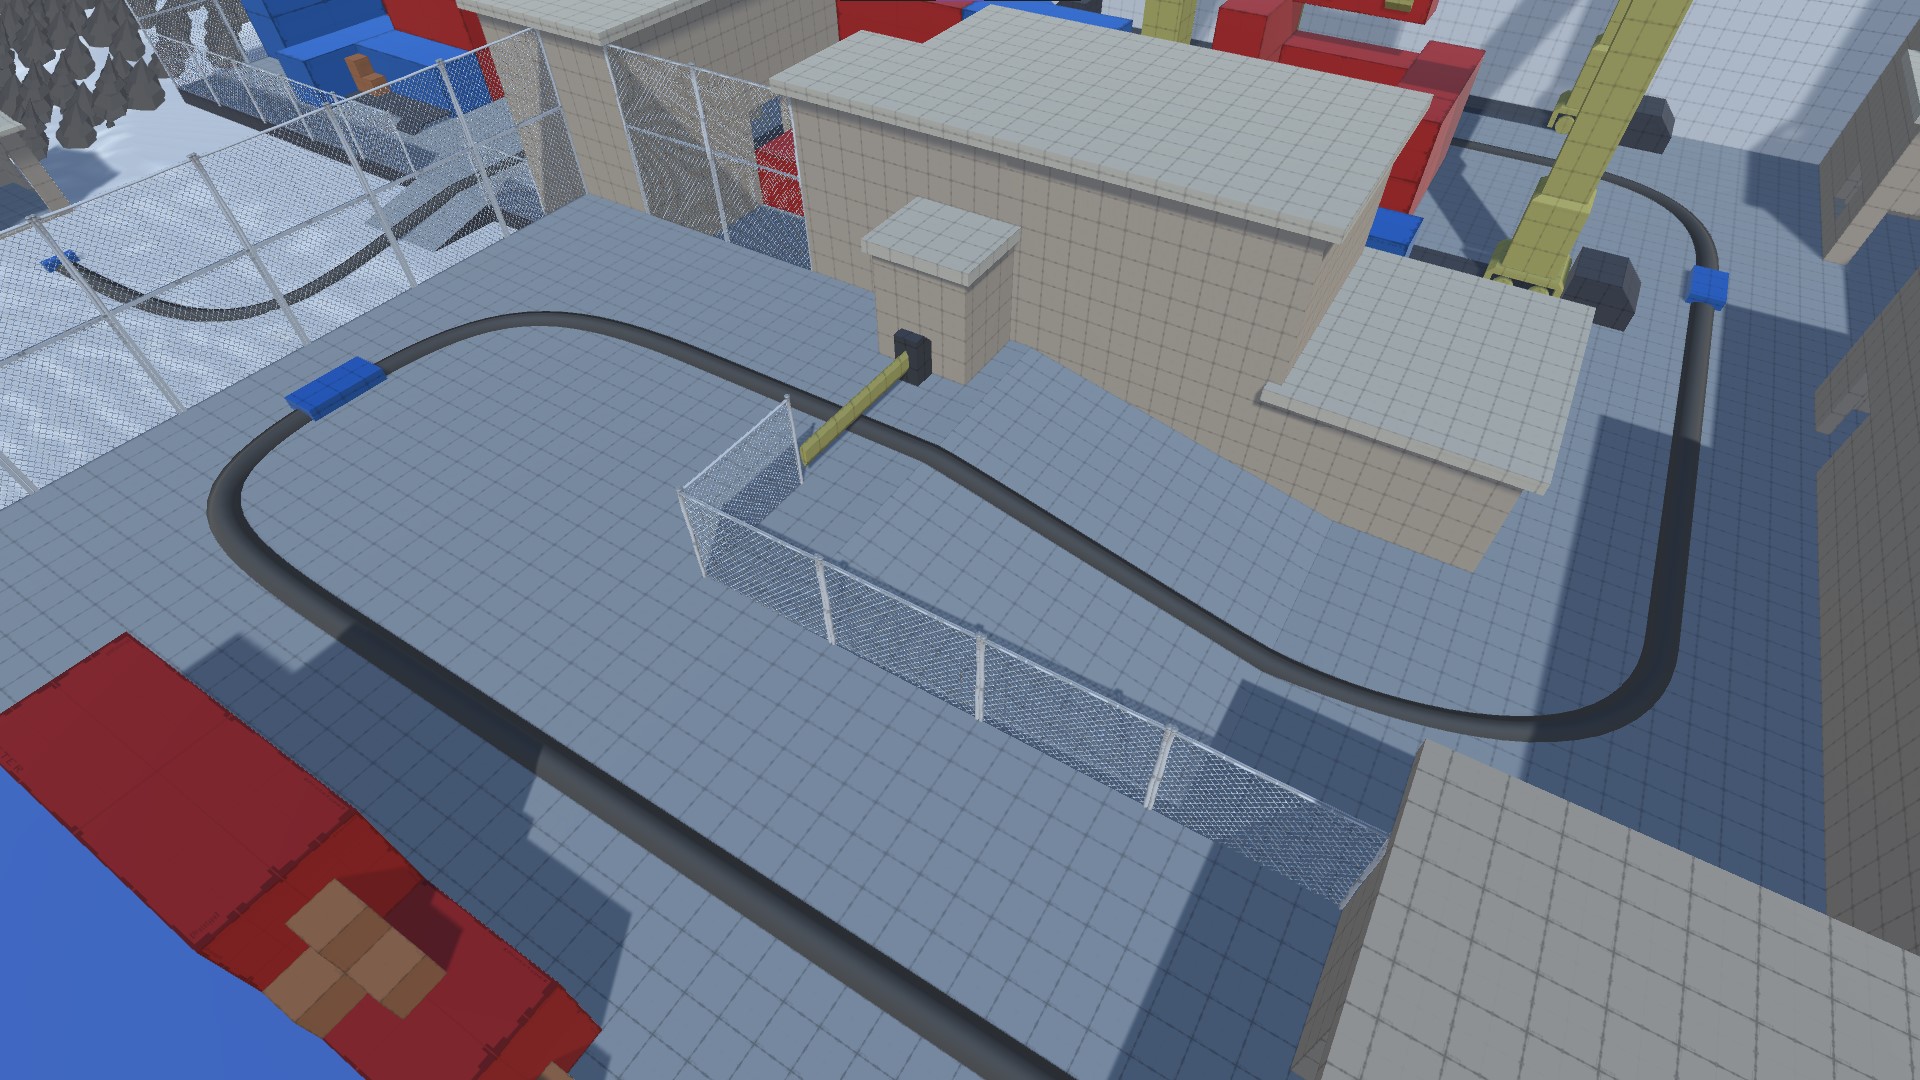
Maps generally need an element that stands out and gives them an identity, which is what this large gantry crane covering the area before point B provides.
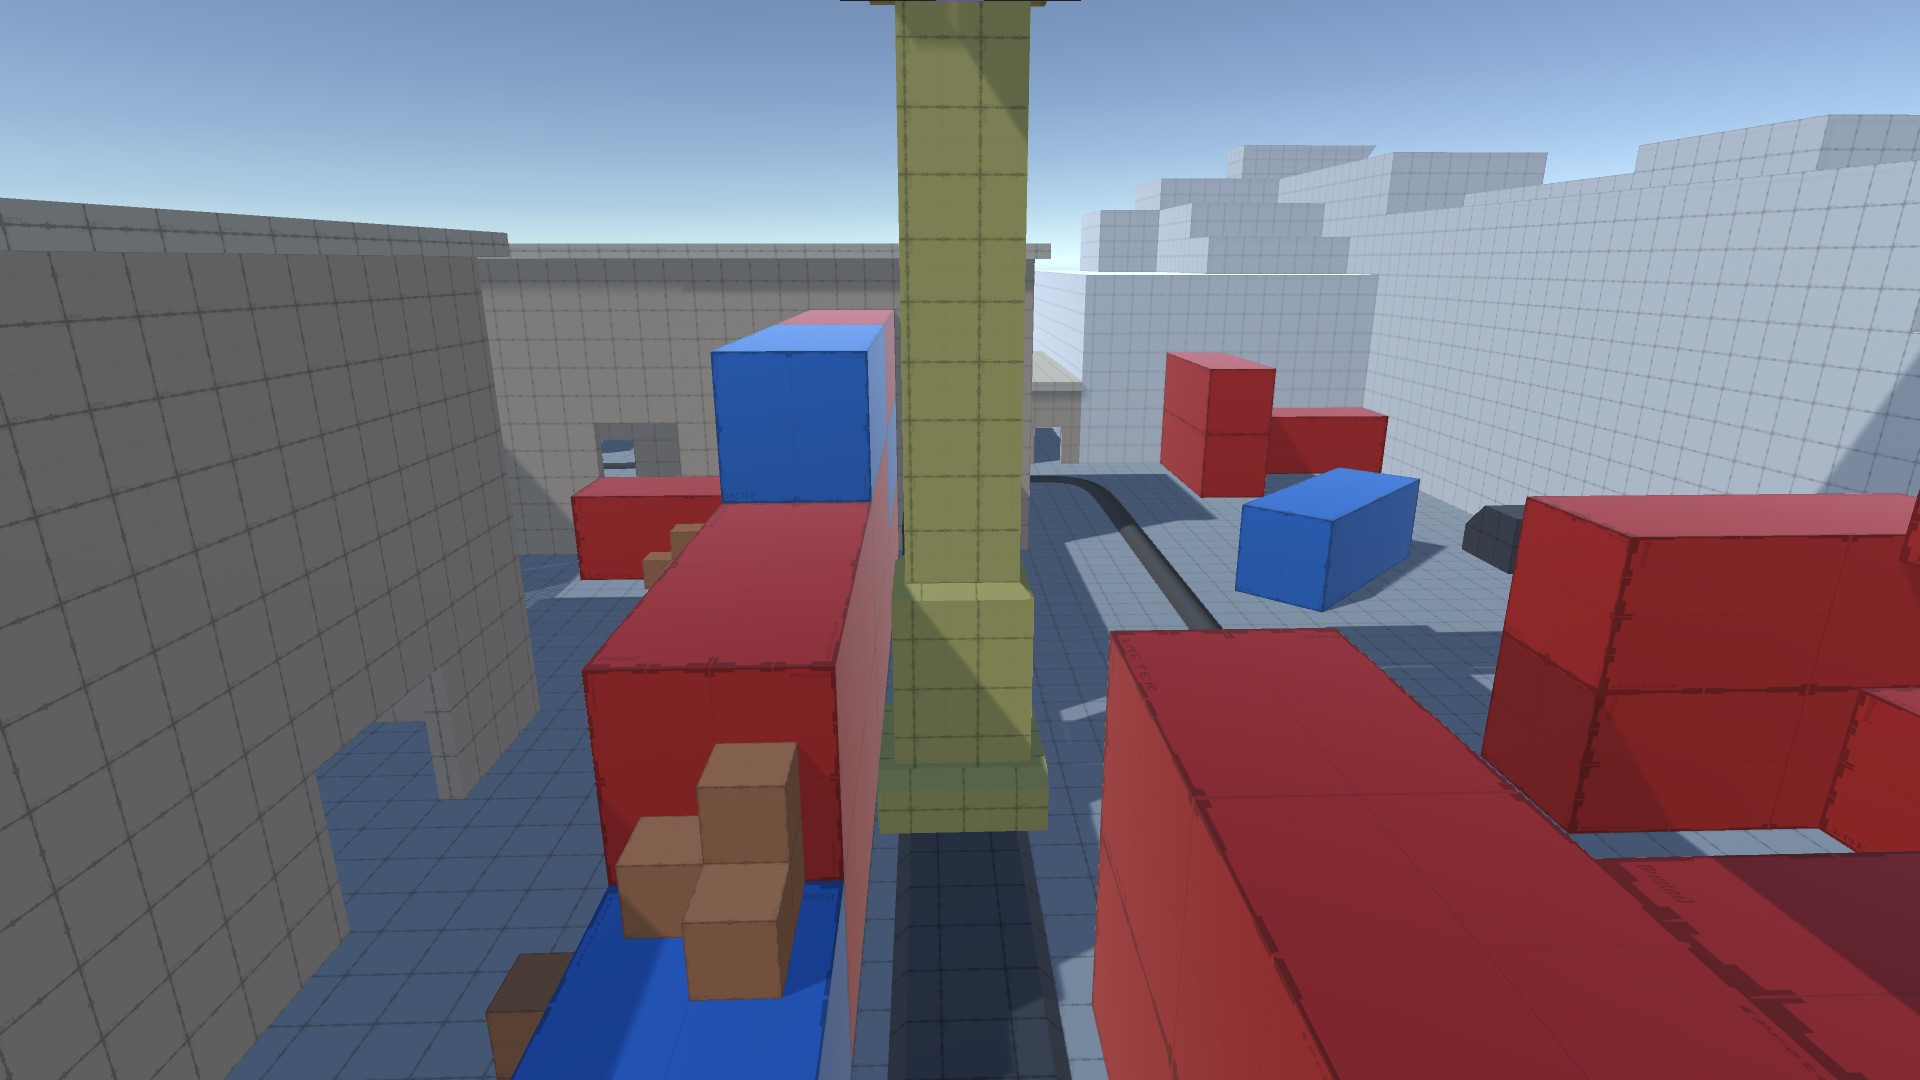
The towers of containers restrict mobility, which gives an advantage to the defending team. A possible sentry nest spot is located atop a single container, and covered from Demo spam above.
RED’s position here is strong; however the area is difficult to navigate, a flank route leads directly into their spawn, and their path towards defendable positions crosses directly with BLU. Point B is easy to defend, but hard to recover if RED loses ground on it.
It is generally a good idea to compensate the team that was more recently challenged, and then create equal ground to ensure everyone is up to speed.
Because RED must cover more distance now that the spawns have moved, a payload ramp is placed to stall the BLU team and give RED a chance to regroup. In TF2, payload ramps require a single push to beat, since as soon as the cart is let go it falls back down. At the top of said ramp, BLU must wait for the barrier to rise.
The area following point C is a straight symmetrical passage roughly equidistant to both spawns, where teams must fight on even terms right before the final stretch.
After capturing C, BLU gains access to a newflank route through the small building adjacent to RED’s base, as providing multiple access points to the newer area prevents stalemates.
Said room is wide and open, with catwalks and platforms in place to create more interesting combat and ways for Spies and Scouts to maneuver around the fight in relative safety. Right after this room, BLU must push the cart through a tight chokehold that leads right at the gates of RED’s spawn. To better their chances, BLU should take control over the catwalk room and establish Dispensers and Teleporters to maintain their fighting ability.
RED is meant to hold the advantage in the last point of most payload maps, because it creates more interesting matches. However, to give BLU some options, a second floor is added for more access points to the choke and the point. The ramp present on the layout has been removed given how close RED’s spawn is, which makes a single push very rare and would mean BLU can only win if they are steamrolling, which is not very fun in this game mode.